
Checking Your Own Fluid Levels Without a Mechanic
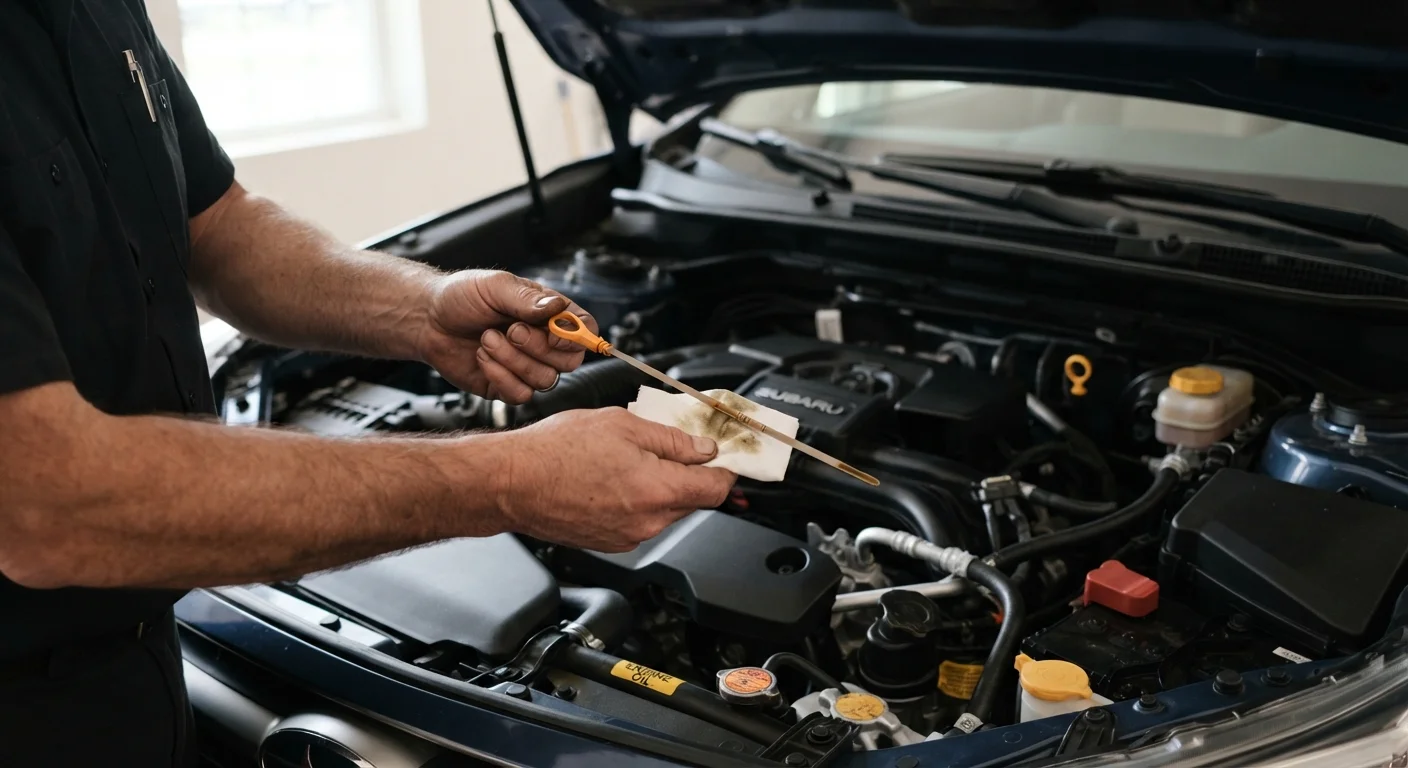
Photo credit: InsightsGrove.com | Discover Joy In Reading
In this article
Engine oil, coolant, brake fluid, power steering fluid—a straightforward walkthrough for checking and topping up your car's essential fluids at home.
Key Takeaways
- Most fluid checks require only a clean rag and five minutes with the hood open.
- Always check fluids on a level surface with a cold or fully warmed engine, depending on the fluid.
- Low or discolored fluid can signal a developing problem worth addressing before it becomes expensive.
- Your owner's manual specifies the correct fluid types - using the wrong one can cause damage.
- Routine self-checks complement, but do not replace, scheduled professional servicing.
Why Fluid Checks Are Worth Your Time
Fluids are the circulatory system of your car. Engine oil lubricates moving metal parts, coolant prevents overheating, brake fluid transfers pedal force to the calipers, and power steering fluid (where present) makes steering manageable. When any of these drops too low or degrades, the resulting damage can cost far more than a routine service visit - think seized engines, warped brake rotors, or overheated transmissions.
The good news: checking all four major fluids takes roughly 10-15 minutes and requires no mechanical skill. It's one of the simplest habits that pays for itself over time by catching small problems before they escalate. If you're also trying to make sense of when each fluid is actually due for a full change, reading your service schedule is a logical next step.
What you will need
What You'll Need
No specialized tools are required. The items below are all you need for a complete fluid inspection, and most are already in your home or car.
Lint-free rag or paper towels
Wiping the dipstick clean before taking an accurate oil reading.
Owner's manual
Identifying the correct fluid grades, reservoir locations, and fill capacities for your specific vehicle.
Disposable gloves
Protecting hands from engine oil, coolant, and brake fluid, some of which can irritate skin.
Flashlight or phone torch
Illuminating reservoir markings and dipstick graduations in darker engine bays.
Refer to your owner's manual throughout - it identifies the exact reservoir locations for your make and model, and specifies the correct fluid grades. Using the wrong specification - for example, mixing coolant types or using the wrong brake fluid rating - can cause damage that voids any remaining warranty and leads to expensive repairs. As covered in our piece on cheap maintenance shortcuts, the wrong fluid is a false economy.
Step-by-Step Fluid Checks
Work through the fluids in the order below. Each check takes two to three minutes. If you find any level significantly below the minimum marker, or see fluid that looks discolored, milky, or smells burnt, note it and decide whether a top-up is appropriate or whether a mechanic should investigate.
Park on a level surface and gather your materials
Pull onto flat ground and turn off the engine. For the most accurate oil reading, let the engine sit for at least five minutes so oil drains back into the sump. Have your rag, owner's manual, and gloves ready before opening the hood. Locate and release the hood latch - typically a lever under the dashboard on the driver's side - then lift the hood and secure it with the prop rod if your vehicle has one.
Check the engine oil
Find the oil dipstick - it usually has a brightly colored ring handle and is labelled with an oil-can symbol. Pull it out fully, wipe it clean with your rag, reinsert it all the way, then withdraw it again. The oil level should sit between the two marks at the bottom of the dipstick. Also note the oil's color: fresh oil is amber; very dark or gritty oil may indicate it's overdue for a change.
If the level is below the lower mark, add small amounts of the grade specified in your owner's manual - do not overfill, as excess oil can damage seals.
Check the coolant (engine cold only)
Locate the translucent coolant reservoir - typically found near the radiator, marked with a thermometer or wave symbol. Check the level against the MIN and MAX lines on the side of the bottle; you should not need to open the cap for a routine level check. If the level is low, top up with the premixed coolant type your manual specifies - different formulations are not interchangeable.
Check the brake fluid
The brake fluid reservoir is a small semi-translucent container on top of the brake master cylinder, usually located at the back of the engine bay on the driver's side. Check the level against the MIN/MAX markers on the outside - no need to open it for a visual inspection. Brake fluid should be pale yellow; dark or murky fluid is a sign it has absorbed moisture and should be assessed by a qualified mechanic.
Check the power steering fluid (if applicable)
Many newer vehicles use electric power steering and have no fluid reservoir - consult your owner's manual first. On vehicles with hydraulic power steering, the reservoir is typically a small capped container near the front of the engine with a steering-wheel symbol. Some have a dipstick on the cap; others have MIN/MAX lines on the translucent body. Check the level and the fluid color - it should be clear to light pink, not dark or cloudy.
Check the windshield washer fluid
The washer fluid reservoir is the only tank where running low poses no mechanical risk - but it does affect visibility and safety. Find the reservoir (marked with a spray or windshield symbol), unscrew the cap, and visually check the level. Top it up with a purpose-made washer fluid; plain water can freeze in winter and leave mineral deposits on jets.
Build It Into a Routine
Link fluid checks to something you already do monthly - such as the first time you fill up with fuel each month. Keeping your rag and gloves in the trunk means you're never unprepared. Consistent, brief checks are far more effective than occasional thorough inspections done irregularly.
For guidance on which jobs are sensible to handle yourself versus which genuinely warrant a workshop visit, see our DIY vs. workshop breakdown.
How Often Should You Check?
A general rule of thumb: check engine oil and coolant once a month and before any long trip. Brake fluid and power steering fluid are more stable and can be inspected every three months, or whenever you notice a change in braking or steering feel. If your car sits unused for extended periods, fluid degradation can still occur - low-mileage car maintenance explains why infrequent driving doesn't mean infrequent attention.
These checks supplement, not replace, the intervals in your manufacturer's service schedule. A mechanic will also look for leaks, hose condition, and other factors a visual inspection can't reveal.
When to Stop and Call a Mechanic
If you find a fluid significantly below the minimum line with no obvious top-up history, or if the same fluid keeps dropping between checks, these are signs of a leak or internal issue that a top-up alone won't fix. Continuing to drive with a brake fluid or coolant leak in particular can lead to dangerous situations. Have the vehicle inspected before assuming the problem is resolved.

Author
Car Ownership Editorial Team
Car Ownership Editorial Team is the collective byline for our editorial team and contributor network. Articles published under this byline or an editorial pen name are researched, written, and reviewed according to our editorial standards for clarity, consistency, and independence before publication.
View all articles →