
DIY Tile Repair: What the Job Actually Involves Before You Start
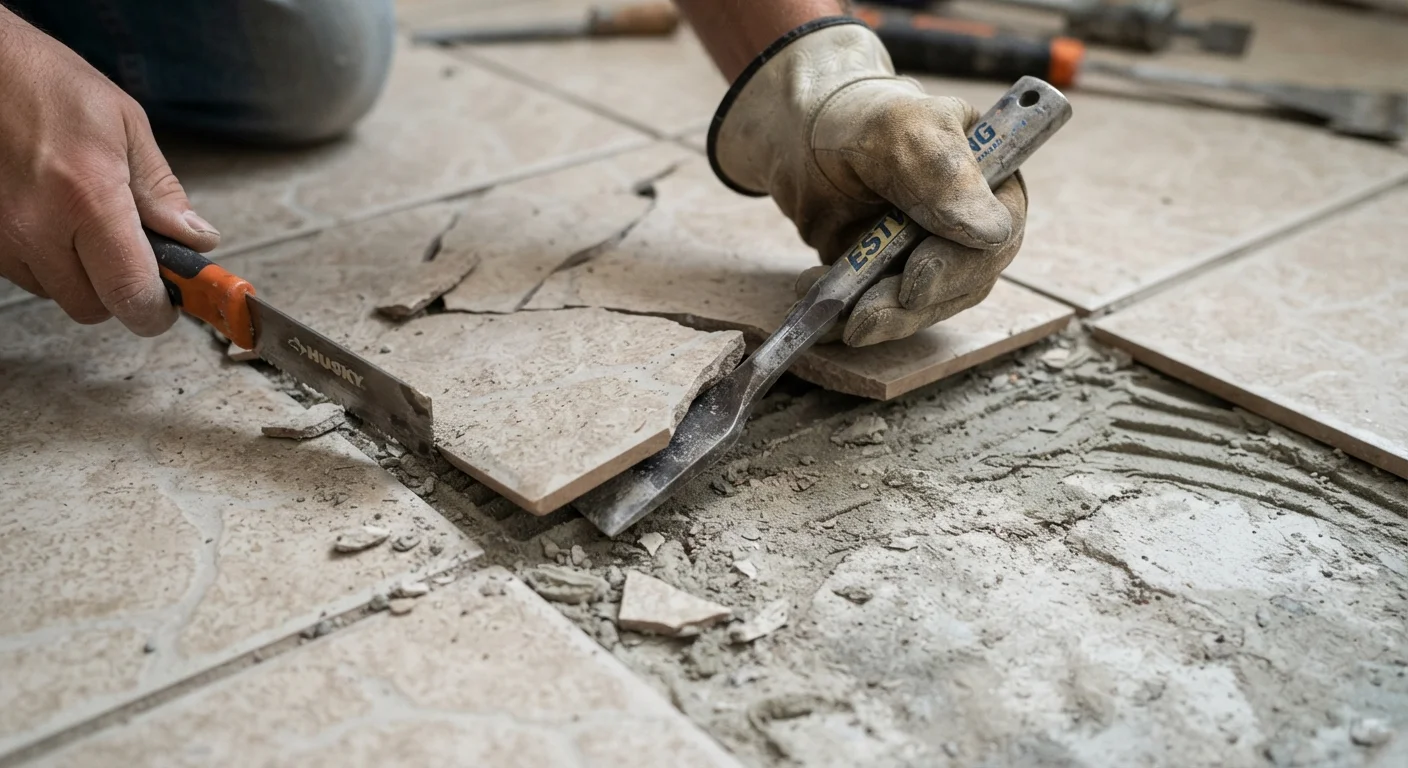
Photo credit: InsightsGrove.com | Discover Joy In Reading
Replacing a cracked tile sounds straightforward. Understanding the full process — substrate, adhesive, grout matching — saves wasted effort.
Key Takeaways
- Assessing the substrate condition before buying materials prevents wasted effort and repeat repairs.
- Matching grout color and texture is one of the trickiest parts of a tile repair - plan for it early.
- Hollow-sounding tiles nearby signal adhesion failure that a single-tile fix won't solve.
- Most tile repairs require 24-48 hours of cure time between adhesive and grout stages.
- Renters should confirm with their landlord before doing any tile work - liability and lease terms vary.
What You're Actually Getting Into
A cracked or loose tile looks like a quick swap. In practice, the repair involves four distinct phases - removal, substrate prep, adhesive cure, and grouting - each with its own drying window. Rushing any phase tends to produce a result that fails within a year. Understanding the full sequence upfront prevents mid-project surprises and unnecessary material purchases.
The most common mistake DIYers make is buying a replacement tile and adhesive before assessing what's underneath. Tile failure - whether cracking, popping, or debonding - almost always has a cause. That cause might be impact damage (genuinely random, easy to fix), substrate movement, water infiltration, or an original installation that skimped on adhesive coverage. Only the first scenario is a simple swap. The others require fixing the root problem first, or the new tile will fail in the same way.
For renters, there's an additional layer of consideration. Check your lease and confirm with your landlord before starting - some leases prohibit tenant modifications, and tile work that goes wrong could become a liability issue. See our guide on rental repairs you can legally do yourself for a practical breakdown of where the lines typically fall.
Check for Structural or Water Damage First
A cracked tile can be a symptom of a failing substrate - particularly in wet areas like bathrooms. If the subfloor feels soft, spongy, or the tile rocks when pressed, water damage or rot may be present beneath. In those cases, replacing the tile without fixing the underlying cause will result in the same failure within months. If you suspect structural damage, consult a qualified contractor before proceeding.
For broader context on scoping any home repair before spending money, the Budget Home Repair complete reference covers tools, material selection, and how to evaluate a job before you commit.
Grout saw or oscillating multi-tool with grout blade
Removes existing grout from joints surrounding the damaged tile without cracking adjacent tiles.
Cold chisel and hammer
Breaks apart and lifts the damaged tile from the substrate.
Putty knife or floor scraper
Clears old adhesive residue from the substrate surface before relaying.
Notched trowel
Spreads tile adhesive evenly to ensure consistent bonding contact.
Rubber mallet and tile spacers
Sets the replacement tile level and maintains consistent joint width.
Grout float
Presses grout into joints and wipes excess from the tile surface.
Sponge and bucket
Cleans grout haze from the tile face before it fully sets.
Knee pads
Protects joints during extended floor-level work.
The Grout Matching Problem - and Why It Matters
Grout matching is underestimated by almost every first-time tile repairer. Grout color changes as it ages and as it accumulates mineral deposits, cleaning products, and foot traffic. A fresh grout line next to five years of aged grout will be visible - sometimes strikingly so. This doesn't mean the repair is wrong; it just means the visual result may not be seamless, and that's worth knowing before you start.
To get as close as possible: bring a photo of the tile area (with the grout clearly visible in good light) to the hardware store, and if you can, chip out a small piece of existing grout and bring the fragment. Most stores carry a range of standard shades, and staff can sometimes help narrow it down. Grout also dries lighter than it looks when wet, which compounds the matching difficulty.
If recurring grout failure - rather than tile cracking - is the actual problem you're seeing, the repair approach is different. Our article on why grout keeps cracking and what actually fixes it explains how to diagnose the underlying cause before reaching for the grout bag again.
Grout Dust and Adhesive Fumes Are Hazards
Cutting or grinding old grout generates fine silica dust, which is a respiratory hazard with repeated exposure. Always work in a ventilated space and wear an appropriate dust mask (N95 or better). Some tile adhesives also off-gas during application - keep windows open and follow the manufacturer's safety guidance on the label.
What you will need
Once you've confirmed your materials and assessed the substrate, the repair itself follows a logical sequence. Take each step in order and respect the cure times - the process is forgiving when you don't rush it.
Tap-test the surrounding area
Before touching the damaged tile, use your knuckles to tap a 12-inch radius around it. A solid, dense sound indicates good adhesion. A hollow or drum-like sound means the tile has debonded from the substrate - a single-tile swap won't resolve the underlying adhesion failure in those areas. Map out exactly which tiles are compromised before buying materials.
Remove the grout surrounding the damaged tile
Use a grout saw or an oscillating multi-tool fitted with a grout-removal blade to cut through the grout joints on all four sides of the tile. Work slowly and keep the blade perpendicular to the joint - angling it risks chipping the edges of intact neighboring tiles. Remove grout to a depth of at least two-thirds of the joint height.
Break and remove the damaged tile
Score an X across the face of the cracked tile with a glass cutter or multi-tool, then place a cold chisel near the center and strike firmly with a hammer. Work outward from the center in sections, lifting fragments with a putty knife. Avoid levering against adjacent tiles - that pressure can crack them or break their adhesive bond.
Clean and assess the substrate
Scrape all remaining adhesive from the substrate using a floor scraper or putty knife. The surface must be flat, dry, and structurally sound. Press the substrate firmly - any flex or softness in a floor application suggests subfloor damage that needs addressing before relaying tile. Dust and vacuum the area thoroughly; adhesive bonds poorly to debris.
Apply adhesive and set the replacement tile
Using a notched trowel, spread the appropriate tile adhesive (thin-set mortar for floors and most wet areas; mastic adhesive only for dry wall applications) onto the substrate. Back-butter the replacement tile as well for better coverage. Press the tile firmly into position using tile spacers to maintain joint width, then tap it level with a rubber mallet. Check it is flush with surrounding tiles using a straightedge.
Allow adhesive to cure fully before grouting
Follow the adhesive manufacturer's cure time - typically 24 hours for thin-set mortar, though humidity and temperature affect this. Do not rush this step. Grouting over uncured adhesive traps moisture and leads to early grout failure. Remove tile spacers before the adhesive becomes completely rigid, usually after 30-60 minutes.
Grout the joints and clean the tile face
Mix grout to a smooth, peanut-butter consistency. Press it into joints using a rubber grout float held at a 45-degree angle, working diagonally across the joints to pack them fully. Once joints are filled, drag the float diagonally again to remove excess. Wait 15-20 minutes, then wipe the tile surface with a damp (not wet) sponge in circular motions. Rinse the sponge frequently. A fine haze may remain - buff it off with a dry cloth once the grout firms up.
This article provides general home maintenance information for educational purposes. Always verify local building codes and consult a licensed professional for structural, water-damage, or hazardous repair situations.

Author
Home & Living Editorial Team
Home & Living Editorial Team is the collective byline for our editorial team and contributor network. Articles published under this byline or an editorial pen name are researched, written, and reviewed according to our editorial standards for clarity, consistency, and independence before publication.
View all articles →